How to Paint a Fence With a Sprayer
To paint a fence with a sprayer, clean and dry the boards, protect nearby surfaces, then spray in steady, overlapping passes. Test your pattern first and follow the coating label for coverage and drying time.
On this page (9 sections)
- How do you prepare a fence for spraying?
- What paint sprayer works for a fence?
- How should you set up before spraying?
- How do you spray fence boards evenly?
- Should you back-brush after spraying?
- How many coats does a fence need?
- How do you prevent overspray?
- How do you clean the sprayer after painting?
- What is the best way to paint a fence with a sprayer?
To paint a fence with a sprayer, clean and dry the boards, protect nearby surfaces, then spray in steady, overlapping passes. Test your pattern first and follow the coating label for coverage and drying time.
A sprayer can cover fence boards and gaps quickly, but it also sends paint beyond the fence if you don't control overspray. Choose a calm day, protect the area, and keep a brush nearby for missed edges or drips.
How do you prepare a fence for spraying?
Remove dirt and loose, peeling finish, then let the fence dry completely. Paint won't bond well to a dirty or damp surface.
Check the paint label for prep requirements. Scrape loose coating, clean mildew or grime with a suitable cleaner, and rinse if needed.
Repair damaged boards before painting.
Trim plants away from the fence and move furniture, grills, and other items. Mask anything you can't move, including nearby siding, concrete, and hardware that should stay unpainted.
What paint sprayer works for a fence?
The best sprayer depends on the coating, fence size, and how much setup and cleanup you're willing to do. Check that the sprayer is suitable for your paint or stain before you start.
The Graco Magnum X7 Cart draws directly from a 1 or 5 gallon bucket, has adjustable pressure, and supports up to 100 ft of hose. Those features can suit a large fence project where fewer refills and more reach are useful.
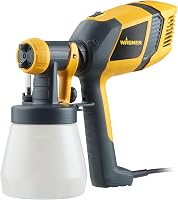
The Wagner Control Spray 250 is designed for stains, lacquers, and some paints, which may require thinning. Its three patterns include horizontal, vertical, and narrow round, and its 800 ml cup suits smaller sections.
The VEVOR 650W Stand Airless has adjustable output pressure, a 25 ft hose, and an extension rod. Check its instructions to confirm that your coating is compatible.
For a broader comparison of equipment, see paint sprayers explained and our guide to paint sprayers for fences and sheds.
How should you set up before spraying?
Set up the sprayer according to its manual, then test the spray pattern on scrap wood or cardboard. Adjust the flow and pattern until the fan looks even and the coating doesn't spit or form heavy edges.
Use the tip and pressure recommended for your coating and sprayer. Don't assume one setting works for every paint; the coating label and sprayer instructions take priority.
Protect yourself with safety glasses, a suitable respirator, gloves, and clothing that covers exposed skin. Follow the coating label and sprayer manual for ventilation and other safety steps.
How far should you hold the sprayer from the fence?
Hold the gun at the distance recommended by its manual, keeping it square to the surface. Moving closer or angling the gun can create uneven coverage and overspray.
Keep the sprayer moving before you pull the trigger, and release it at the end of each pass. This helps prevent heavy spots where you start or stop.
How do you spray fence boards evenly?
Work one manageable section at a time, using smooth passes that overlap slightly. Keep your speed and distance consistent as you move along the boards.
Spray the edges and gaps carefully, then cover the broad faces with parallel passes. Avoid lingering on knots or corners, where paint can build up and run.
Check the fence from different angles as you work. Use a brush to reach missed joints or smooth a drip while the coating is still workable, following the paint maker's directions.
If the fence has two sides, plan to coat both as the paint instructions allow. Leave enough time for the first side to dry before working near it.
Should you back-brush after spraying?
Back-brush when the coating instructions call for it or when textured wood needs help spreading the finish into gaps. Keep a brush beside you and follow the sprayer pass while the coating is wet.
Work in short sections so the sprayed coating doesn't dry before you brush it. Avoid brushing repeatedly, which can leave marks or pull coating away from the surface.
For stain projects, our step-by-step guide to spraying a deck with stain covers related prep and application decisions. If you're unsure which coating works with your equipment, read what kind of paint works best in a sprayer.
How many coats does a fence need?
Use the number of coats and recoat time on the paint label. Coverage depends on the coating, wood condition, and how much the boards absorb.
Let the first coat dry as directed before applying another. Don't add a second coat just because the color looks uneven while wet; inspect it after the stated drying period.
Watch for bare patches on edges and board ends. Touch them up only when the coating instructions allow, and keep the finish even across the section.
How do you prevent overspray?
Spray only when the wind is light and directed away from exposed surfaces. Wind can carry paint onto plants, cars, windows, and neighboring property.
Use drop cloths or masking film to protect anything nearby. Pause if the wind picks up, and check the area around the fence between passes.
A test pass helps you see how far the spray travels. Change your position or add protection if paint is reaching beyond the work area.
How do you clean the sprayer after painting?
Clean the sprayer right after the job using the process and cleaning solution specified in its manual. Dried paint can block the tip and make later cleanup harder.
Relieve pressure and flush the system as directed. The Graco Magnum X7 includes a PowerFlush adapter that connects to a garden hose; use it according to the manual.
For more detail, follow our guide to cleaning an airless sprayer after latex paint. Keep cleaning solution and paint residue away from drains and follow local disposal rules.
What is the best way to paint a fence with a sprayer?
Choose an airless sprayer for a larger fence where bucket-fed spraying and hose reach help; choose a smaller stain sprayer for a modest fence project. In either case, confirm coating compatibility and follow the manual.
Prepare the boards first, mask nearby surfaces, and practice on scrap before spraying the fence. If you want to compare equipment by fence size and coating, see our guide to the best paint sprayers for fences.
Frequently asked questions
What is the best way to paint a fence with a sprayer?
Clean the fence, let it dry, mask nearby surfaces, and test the spray pattern on scrap material. Hold the gun at a consistent distance and move steadily along each board, overlapping passes slightly.
Follow the paint label for surface preparation, suitable application, and drying time.
Should I brush or roll after spraying a fence?
Back-brushing or back-rolling can help work coating into gaps and textured wood, but follow the paint maker's directions. Keep a brush or roller handy as you spray, and work in manageable sections so the coating stays wet enough to even out.
Can I spray a fence without thinning the paint?
It depends on the coating and sprayer. Check both manufacturers' instructions before thinning, since some coatings are ready to spray while others may need adjustment or may not suit the sprayer.
Don't thin by guesswork; a change can affect coverage and the finish.
What should I cover before spraying a fence?
Cover plants, siding, walkways, cars, and other surfaces that overspray could reach. Check the wind before starting, and mask both sides of the fence where needed.
Keep people and pets away from the work area until spraying is finished and the coating has dried as directed.