How to Prime an Airless Paint Sprayer
To prime an airless paint sprayer, place the suction tube in paint, set the prime valve to prime, and run the pump until paint returns through the drain tube. Then switch to spray mode and clear air from the hose and gun as your manual directs.
On this page (7 sections)
- What do you need before priming an airless paint sprayer?
- How do you prime an airless paint sprayer step by step?
- Why does an airless paint sprayer lose prime?
- What should you check if the sprayer spits after priming?
- Which sprayers suit home projects that need priming?
- What should you do after priming?
- How to prime an airless paint sprayer without trouble
To prime an airless paint sprayer, put the suction tube in paint, set the valve to prime, and run the pump until paint flows steadily through the return tube. Then set it to spray and clear air from the hose and gun according to the manual.
Priming fills the pump and lines with paint so the sprayer can deliver a steady flow. The exact controls differ by model, so use your sprayer's manual for valve positions, pressure settings, and pressure relief steps.
What do you need before priming an airless paint sprayer?
Gather the sprayer manual, paint, a clean waste container, and protective gear before you start. Wear eye protection and follow the paint label for ventilation and other safety steps.
Check that the sprayer is on a stable surface and that the hose, gun, and tip guard are connected as instructed. Keep the gun pointed away from people, pets, and anything you don't want coated.
Strain or mix paint only if the paint maker or sprayer manual calls for it. For help choosing paint that suits a sprayer, see what kind of paint works best in a sprayer.
How do you prime an airless paint sprayer step by step?
Use the prime setting to circulate paint through the pump and return line before switching to spray. Follow the model manual if its sequence differs from these general steps.
- Turn the sprayer off and relieve pressure as directed in the manual.
- Place the suction tube in the paint container and the return tube in a waste container.
- Set the prime or drain valve to the prime position.
- Turn on the sprayer and use the startup setting or pressure level specified by the manual.
- Let it run until paint moves steadily through the return tube.
- Turn the sprayer off, switch the valve to spray, then clear air from the hose and gun into a waste container.
Keep the return tube secured inside the waste container while the pump runs. If paint does not flow, turn the unit off and follow the manual's troubleshooting and pressure relief steps before checking the setup.
How do you know the pump is primed?
The pump is primed when paint flows steadily from the return tube without visible air spurts. A short burst of air at startup can be normal, but flow should settle before you change modes.
After switching to spray, clear air from the hose and gun into a suitable waste container, following the manual. Do not assume the gun is ready just because paint has reached the return tube.
Why does an airless paint sprayer lose prime?
An airless sprayer can lose prime when air enters the intake or fluid path, or when paint cannot reach the pump. Check the simple setup issues first, with the machine off and pressure relieved as instructed.
Common causes include:
- The suction tube is not fully submerged in paint.
- The return tube has slipped out of the waste container.
- The intake screen or filter is clogged.
- A fitting is loose or a seal is damaged.
- Paint is too thick for the sprayer's instructions.
- The prime valve is not in the correct position.
Don't keep running a pump that is not drawing fluid. Turn it off and consult the manual before inspecting filters, fittings, or the intake.
Could paint thickness prevent priming?
Yes, paint that is too thick for the sprayer can slow or stop flow. Check the coating label and the sprayer manual for any thinning or straining guidance.
Don't add water or another thinner by guesswork. The right preparation depends on the coating, and some paints should not be thinned.
What should you check if the sprayer spits after priming?
Spitting after priming often means air remains in the hose or gun, or the fluid flow is interrupted. Clear the hose and gun as the manual directs, then check the intake, filters, and connections if the spray stays uneven.
Use a test surface or waste material before moving to the project. A steady fan pattern indicates the sprayer is ready; for more causes and fixes, read why an airless paint sprayer spits.
Don't remove a tip or filter while the unit is pressurized. Use the pressure relief procedure before cleaning or adjusting parts.
Which sprayers suit home projects that need priming?
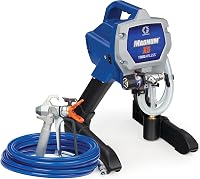
A sprayer with a flexible suction tube can draw directly from a paint bucket, which can make setup straightforward for home projects. The Graco Project Painter Plus and Graco Magnum X5 both include that feature.
The Project Painter Plus is described for projects up to 5 gallons and supports up to 50 ft of paint hose. See our paint sprayers explained guide for a broader look at sprayer types and jobs.
The Magnum X5 is described for projects up to 10 gallons. Either model still needs the startup sequence and pressure relief steps in its manual.
The VEVOR 750W Stand Airless has a 7.6 meter hose and adjustable speed control. Check the included instructions for its specific priming procedure and suitable coatings.
What should you do after priming?
After priming, clear air from the hose and gun, test the spray, and keep the unit's safety steps in mind. Use the manual's procedure each time you switch fluids or prepare the sprayer for storage.
When the job is done, clean the sprayer according to the coating type and model instructions. Our guide to cleaning an airless sprayer after latex paint covers the next step.
How to prime an airless paint sprayer without trouble
To prime an airless paint sprayer, circulate paint through the return line until the flow is steady, then clear air from the hose and gun. Follow the manual for the valve positions and pressure relief procedure.
If flow will not settle, stop the pump and check paint level, intake, filters, and fittings after relieving pressure. Once primed, test the spray pattern on scrap before starting the project.
Frequently asked questions
How long does it take to prime an airless paint sprayer?
It usually takes a few minutes once the sprayer is assembled and the paint is ready, but follow the time and flow instructions in your model's manual. Stop when paint flows steadily through the return tube, then clear air from the hose and gun before spraying.
Should the spray gun be open while priming?
Usually, the gun stays closed while the pump circulates fluid through the prime or return line. The exact valve positions vary by sprayer, so use the manual's startup steps and keep the gun pointed into a waste container when you open it to clear the hose.
Why won't my airless sprayer prime?
An airless sprayer may fail to prime if the suction tube is not fully in the paint, the intake is blocked, a fitting is loose, or the prime valve is set incorrectly. Turn the unit off and relieve pressure as directed before checking connections or clearing a blockage.
Do you prime an airless sprayer with water?
Use the fluid recommended by the sprayer manual. Water may be used to flush some water-based paint systems, while other models call for a specific startup or storage fluid; don't put water into paint or coatings that are not water-based.